How to Repot Indoor Plants Without Damaging Roots
Published: 26 Sep 2026
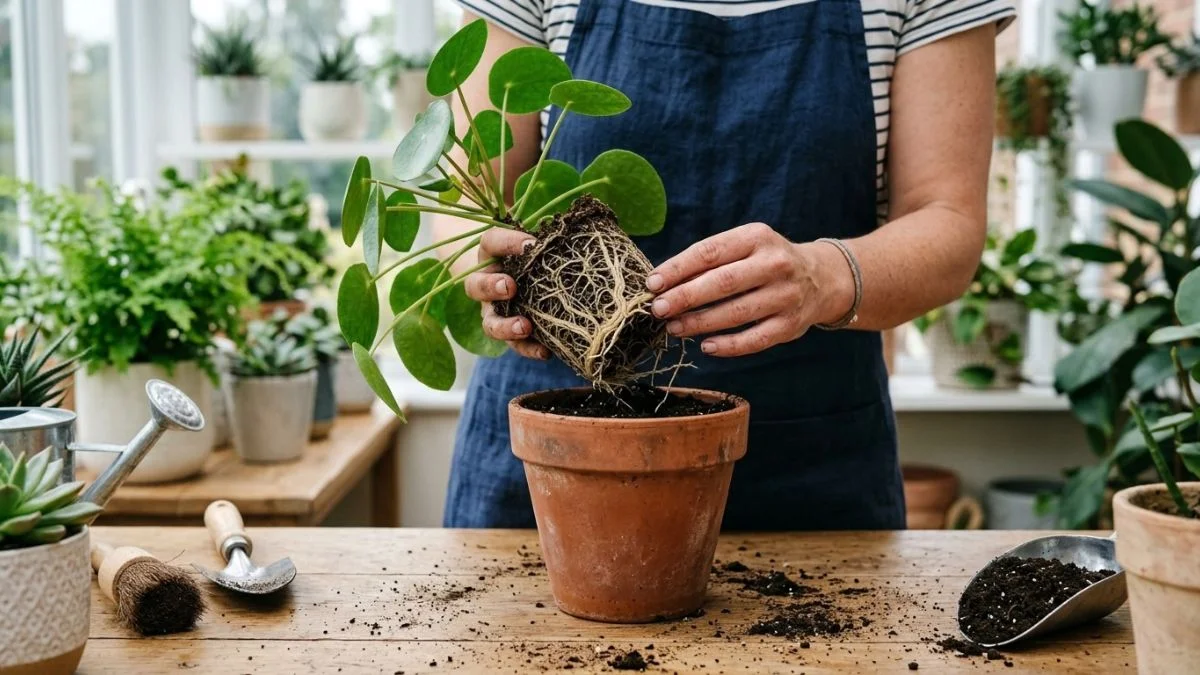
Anyone who’s ever lifted a houseplant out of its container and felt a chunk of root snap off knows the sinking feeling that follows. Learning how to repot indoor plants without damaging roots really comes down to three things: reading the timing right, handling the plant gently, and resisting the urge to rush. It’s not just messy when it goes wrong a bad repot can set a plant back weeks.
This guide breaks down the whole process step by step, so the next time you repot whether it’s a leafy plant from your home office or a display piece on open shelving your plant barely notices the change.
Table of Contents
What Causes Root Damage During Repotting
Root injury usually isn’t bad luck, it’s impatience. The thinnest roots on a plant, the ones responsible for most of its water and nutrient absorption, are also the most delicate. Tugging a plant free by its stem, forcing a stubborn pot open, or raking through the root mass too hard tears away exactly the structures a plant relies on most.
The University of Illinois Extension explains that transplant shock sets in when a root system is disturbed faster than the plant can adapt, which slows water uptake and often shows up as wilting or dropped leaves in the days or weeks afterward. That single fact explains why a slow, careful approach beats speed every time.
How to Tell a Plant Actually Needs Repotting
Repotting only helps when it’s actually needed; doing it too often is its own source of stress. Before reaching for a new pot, check for these signals:
- Roots visible through the drainage holes or wrapping across the topsoil
- Water passing through the pot almost instantly instead of soaking in
- A plant that leans or tips over because its base feels unstable
- Growth that has clearly stalled despite good light and regular feeding
- More than a year to eighteen months since the last repot, with the container looking cramped
If your plant shows none of this, it’s better left undisturbed for now. A large share of unnecessary root damage comes from repotting plants that didn’t need it in the first place, which is exactly why learning to repot indoor plants without damaging roots starts with knowing when to leave a plant alone.
When Is the Right Time to Repot
Timing shapes the outcome more than people expect. The safest window is the plant’s active growing period generally spring through early summer when roots heal and rebuild fastest.
Repotting during a dormant stretch, like late autumn or winter, leaves a plant with less stored energy to recover from any disturbance, so shock lingers longer. If an emergency forces your hand outside that window root rot being the classic example go ahead, but expect a slower bounce-back.
Picking the Correct Pot Size
A common misstep is sizing up too aggressively. An oversized pot holds far more soil than the young root system can use, and that extra soil stays damp for too long, setting the stage for rot.
A steadier approach: increase the diameter by only one or two inches at a time. That gives roots fresh room without flooding them in excess, slow-drying soil.
Drainage holes aren’t optional. The Missouri Botanical Garden points out that proper drainage keeps soil from becoming waterlogged, which starves roots of oxygen and opens the door to fungal issues.
Terracotta vs. Plastic: Which Pot Suits Your Plant?
Terracotta is porous, so it pulls moisture out of the soil faster, useful for plants like succulents and plants that handle dry air well. Plastic holds moisture longer, which suits plants such as ferns that prefer steady dampness. Neither material wins outright; the right choice depends on what your specific plant needs from its soil.
Getting Your Tools Ready Before You Begin
Prepping everything in advance shortens the time roots spend exposed to open air and fine roots can dry out within just a few minutes of exposure.
Have these on hand:
- A pot one or two sizes up, with proper drainage
- A fresh, well-draining potting mix matched to the plant type
- Clean, sharp shears or a knife for any unavoidable root trimming
- A small trowel or old spoon for handling soil
- Water ready for settling everything afterward
Wiping your tools down with rubbing alcohol beforehand keeps stray bacteria or fungal spores away from any fresh cuts on the roots.
A Step-by-Step Walkthrough for Repotting Without Root Damage
1. Water a Day Ahead of Time
Damp soil holds its shape and slides free more easily than dry, crumbly soil, and it leaves roots slightly more flexible instead of brittle.
2. Ease the Plant Out Don’t Force It
Rather than pulling on the stem, squeeze the sides of a flexible pot to loosen the soil, or slide a knife around the inner rim of a rigid one. Tilt the container and let gravity do most of the work.
3. Hold the Base, Not the Top Growth
Cup the root ball from underneath instead of lifting by the stem. This spreads pressure across the whole plant rather than concentrating it on one narrow point, which is usually where breakage starts.
4. Loosen Tangled Roots Carefully
When roots have wound themselves tightly into the pot’s shape, use your fingers to gently work them apart. Avoid raking through them forcefully; the aim is to nudge roots outward into new soil, not strip them bare.
5. Trim Sparingly
Cut away only roots that are obviously dead brown, soft, or hollow. Firm, pale roots should stay untouched. A clean, precise cut with sharp shears beats tearing every time. If you end up with healthy stem cuttings along the way, don’t toss them; many can be used to propagate new plants in water.
6. Layer Fresh Soil Before Placing the Plant
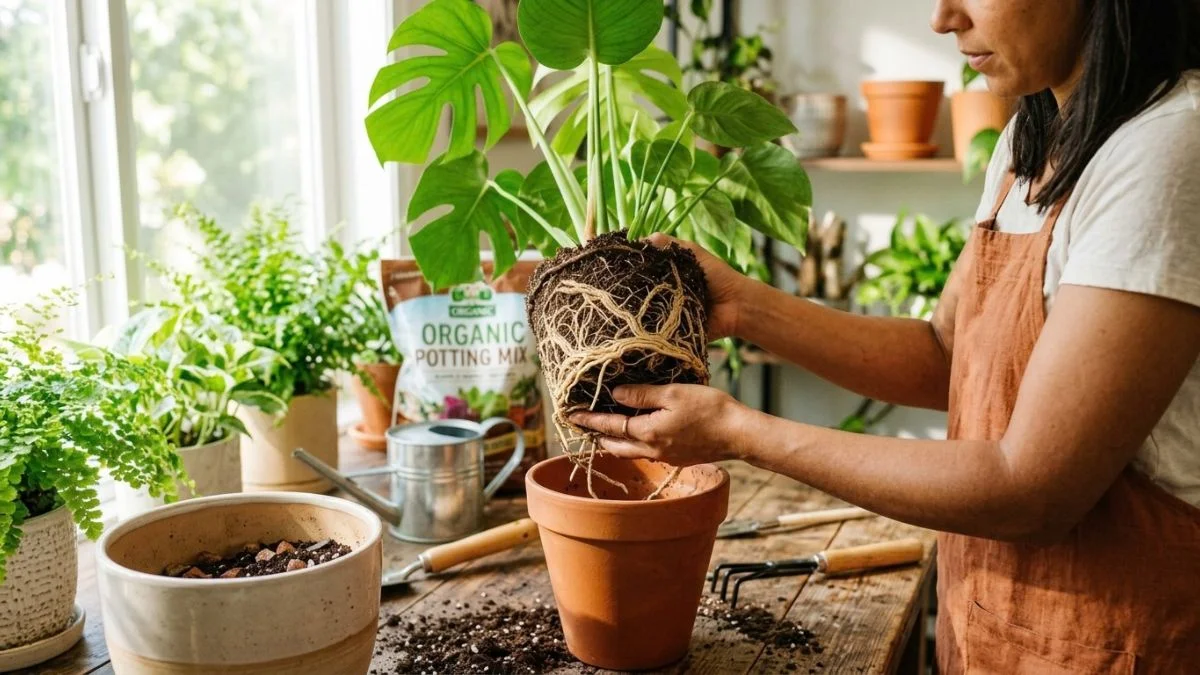
Add a base layer of potting mix to the new container first, then position the root ball so it sits at roughly the same depth as before. Planting too deep can invite stem rot.
7. Fill the Sides Gradually
Pack soil around the edges in small stages, pressing gently to close large gaps without compressing it too tightly. Overly dense soil blocks oxygen from reaching the roots, which can hurt a plant almost as much as physical injury.
8. Give It a Thorough Watering
A deep watering right after repotting helps soil settle around the roots and pushes out remaining air pockets. Water until it drains from the base, then let it finish draining completely standing water at the bottom is a problem waiting to happen.
Helping Roots Bounce Back After Repotting
The two weeks following a repot matter most. Keep the plant away from intense, direct sun and hold off on fertilizer roots that are still recovering can’t process nutrients efficiently, and feeding too soon risks burning them.
Keep moisture steady without overdoing it, and avoid the temptation to lift the plant back out to check on the roots. Disturbing a plant right after repotting undoes much of the careful handling that came before.
Some drooping leaves or light yellowing in the first week or two is normal and usually clears up on its own as the roots settle into their new space. Once your plant looks steady again, it’s safe to move it back to its usual spot, even a snug arrangement on shelves or bookcases.
Mistakes That Commonly Damage Roots
- Sizing up too much at once: leads to excess moisture and root rot
- Pulling on the stem to free the plant: puts all the stress on one weak point
- Repotting during dormancy without a real reason: slows the recovery process
- Choosing a pot with no drainage: traps water around the roots
- Cutting away too many healthy roots: limits the plant’s ability to take up water and nutrients
- Repotting a plant the moment it comes home from the nursery: most benefit from settling in first
Conclusion
Repotting doesn’t need to be nerve-wracking for you or stressful for your plant. Move slowly, support the root ball rather than the stem, resist sizing up too far, and give the plant space to adjust afterward. Stick to this approach, and repotting indoor plants without damaging roots will start to feel routine with sturdier, healthier growth as the payoff.
FAQs
1. How can I tell if my plant has become root-bound?
Watch for roots wrapping around the inside of the pot, pushing out through the drainage holes, or water passing through too quickly to be absorbed all point to a plant that’s outgrown its container.
2. What pot size should I move up to?
Stick to a pot just one or two inches wider than the current one. Going up too many sizes at once invites overwatering and root rot.
3. Is drooping after repotting something to worry about?
Not usually. Mild drooping or slight yellowing for a week or two is a normal part of adjustment and tends to resolve with steady care a sign that you managed to repot indoor plants without damaging roots too severely.
4. Is winter a bad time to repot?
It’s not ideal spring through early summer is best, when the plant has the energy to recover quickly. Winter repotting should be reserved for urgent problems like root rot.
5. Do I need to trim the roots every time I repot?
No. Only remove roots that are clearly dead or rotting. Healthy roots are best left alone trimming only when necessary is one of the simplest ways to repot indoor plants without damaging roots.
6. How often do indoor plants typically need repotting?
Most houseplants do well with repotting every twelve to eighteen months, though fast growers may need it sooner and slow growers can often wait longer.
7. Should the plant be watered before repotting, after, or both?
Both water a day ahead to make removal easier, then water again thoroughly once it’s settled into the new pot.
8. Is it safe to fertilize right after repotting?
Hold off for two to four weeks. Roots still recovering from the move can be damaged by fertilizer before they’re ready to process it, so patience here is key to repot indoor plants without damaging roots successfully.


- Be Respectful
- Stay Relevant
- Stay Positive
- True Feedback
- Encourage Discussion
- Avoid Spamming
- No Fake News
- Don't Copy-Paste
- No Personal Attacks
- Be Respectful
- Stay Relevant
- Stay Positive
- True Feedback
- Encourage Discussion
- Avoid Spamming
- No Fake News
- Don't Copy-Paste
- No Personal Attacks
