Installing a kitchen sink drain sounds intimidating at first. Pipes, fittings, seals, it feels like one wrong move could flood the cabinet or invite mysterious odors into your kitchen. The good news is that learning how to install kitchen sink drain systems is far easier than most homeowners expect.
When you follow proper plumbing logic and use standard parts, this project becomes a straightforward DIY task. You don’t need professional tools or years of experience. You need patience, correct alignment, and an understanding of how water behaves. Gravity, after all, does most of the work.
This guide explains how to install kitchen sink drain assemblies step by step using accepted residential plumbing practices. The instructions focus on accuracy, safety, and long-term reliability, not shortcuts that fail later.
Table of Contents
Why Proper Kitchen Sink Drain Installation Is Important
A kitchen sink drain does more than move water out of your sink. It protects your home from leaks, blocks sewer gases, and keeps your kitchen hygienic.
Improper installation often causes:
- Slow drainage
- Water leaks inside cabinets
- Persistent bad smells
- Mold or wood damage
Most drain failures come from loose fittings or poor alignment, not faulty parts. When you understand how to install kitchen sink drain systems correctly, you prevent these issues before they start.
Tools and Materials You’ll Need
Gather everything before you begin. Stopping mid-project leads to rushed mistakes.
Tools
- Adjustable wrench
- Slip-joint pliers
- Screwdriver
- Bucket or towel
Materials
- Sink strainer with rubber gasket
- Plumber’s putty (or silicone if required)
- Tailpiece
- P-trap kit
- Trap arm
- Dishwasher drain connector (if needed)
Most drain kits sold at hardware stores meet residential plumbing code standards, making them suitable for DIY installation.
Understanding Kitchen Sink Drain Components

Before learning how to install kitchen sink drain parts, you should know what each piece does.
- Sink strainer: Sits in the sink opening and filters debris
- Tailpiece: Vertical pipe below the strainer
- P-trap: Curved pipe that holds water to block sewer gases
- Trap arm: Horizontal pipe leading to the wall drain
Plumbing codes require a P-trap because it creates a water seal. Without it, sewer gases would rise straight into your kitchen. No amount of air freshener can fix that.
Step 1: Install the Sink Strainer Correctly
Start at the sink basin.
Roll plumber’s putty into a thin rope and press it around the underside lip of the sink strainer. Insert the strainer into the sink hole from above.
From below, slide on the rubber gasket, friction ring, and locknut. Tighten the locknut evenly by hand, then finish with pliers.
Remove excess putty from the top.
Pro tip: Overtightening causes cracks and leaks later. Snug beats strong every time.
Step 2: Attach the Tailpiece
Screw the tailpiece onto the threaded bottom of the sink strainer.
If your sink connects to a dishwasher, install the dishwasher inlet fitting on the tailpiece now.
Tighten all slip nuts by hand first. Use pliers only for a final adjustment.
This step plays a major role in how to install kitchen sink drain systems without leaks.
Step 3: Dry-Fit the P-Trap Assembly
Dry-fitting means assembling parts without tightening them fully.
Attach the curved P-trap to the tailpiece. Then align the trap arm with the wall drain opening.
The pipes should align naturally. If you need force, something is wrong.
Plumbing logic: Water flows downhill. Pipes should never fight gravity.
Step 4: Connect the Trap Arm to the Wall Drain
Insert the trap arm into the wall drain stub-out.
Tighten the slip nut and washer evenly.
The trap arm should slope slightly downward toward the wall, about ¼ inch per foot. This slope allows smooth drainage while maintaining the P-trap water seal.
Understanding this slope is essential when learning how to install kitchen sink drain systems properly.
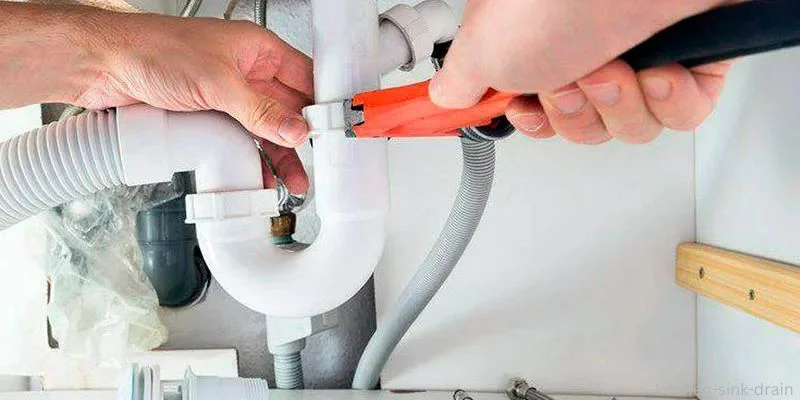
Step 5: Tighten All Connections Carefully
Once everything aligns correctly, tighten all slip nuts evenly.
Avoid power tools. Hand tightening gives better control and prevents cracked fittings.
Each connection should feel firm, not strained.
Step 6: Connect the Dishwasher Drain (If Applicable)
Attach the dishwasher drain hose to the inlet fitting on the tailpiece.
Secure it with a hose clamp.
Create a high loop under the countertop to prevent dirty water from flowing back into the dishwasher. Some areas require an air gap instead, so always check local code requirements.
Step 7: Test for Leaks and Drainage
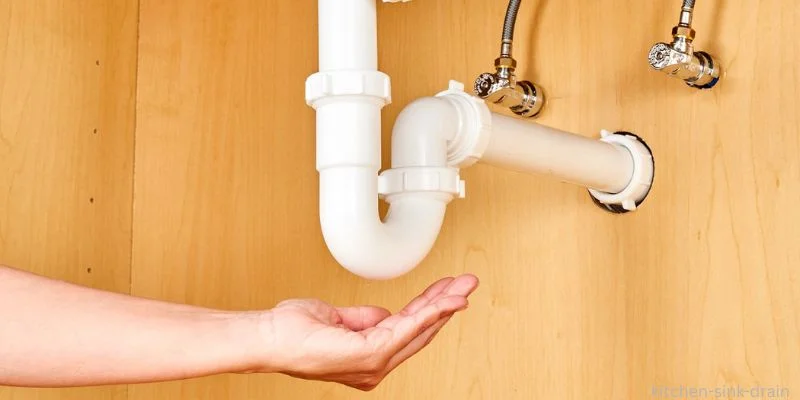
Place a bucket under the drain.
Run water for several minutes and inspect each joint using a dry paper towel.
Next, fill the sink halfway and release the water quickly. This tests pressure points.
Fix leaks immediately. Even slow drips cause long-term damage.
Testing completes the process of how to install kitchen sink drain systems safely.
Common Mistakes to Avoid
Many homeowners repeat the same errors:
- Overtightening slip nuts
- Misaligned pipes
- Skipping the P-trap
- Ignoring slope requirements
Avoiding these mistakes ensures your kitchen drain works reliably for years.
When You Should Call a Professional Plumber
DIY installation works well for standard setups. Call a plumber if:
- The wall drain is too high or low
- Pipes require cutting inside walls
- Sewer gas odors persist
- Local permits are required
Knowing your limits protects your home and your budget.
This video visually demonstrates how to install a kitchen sink drain, making the steps easier to understand for beginners.
Final Thoughts
Learning how to install kitchen sink drain assemblies empowers homeowners to handle basic plumbing confidently. This project saves money, improves understanding of your home, and prevents future problems.
Work slowly. Respect gravity. Tighten gently. Plumbing rewards patience and punishes shortcuts.
FAQs
1. How long does it take to install a kitchen sink drain?
For a standard setup, learning how to install kitchen sink drain usually takes 45-90 minutes. First-time DIYers may need extra time for alignment and leak testing.
2. Do I need plumber’s putty for the sink drain?
When learning how to install kitchen sink drain, plumber’s putty is commonly used to seal the sink strainer. Always follow the manufacturer’s instructions if silicone is recommended.
3. Is a P-trap required under a kitchen sink?
Yes, plumbing codes require a P-trap when you learn how to install kitchen sink drain. It blocks sewer gases while allowing smooth water flow.
4. Why does my sink drain smell after installation?
If odors appear after installing the kitchen sink drain, the P-trap may be dry or misaligned. Loose connections can also allow sewer gases to escape.
5. Can beginners install a kitchen sink drain?
Yes, beginners can learn how to install kitchen sink drain by following step-by-step instructions and checking alignment carefully. Patience and proper fitting are key.