Learning how to install clawfoot tub hardware is a rewarding home improvement project that enhances both the beauty and functionality of your bathroom. Clawfoot tubs offer timeless elegance, but their exposed plumbing and visible fixtures require precise installation to ensure safety, efficiency, and long-term durability.
Because clawfoot tubs are freestanding, proper hardware installation is essential to prevent leaks, water damage, and unstable fixtures. With the right tools and guidance, this project is manageable for DIY homeowners. By understanding how to install clawfoot tub hardware correctly, you can achieve professional results while preserving both performance and aesthetics.
Table of Contents
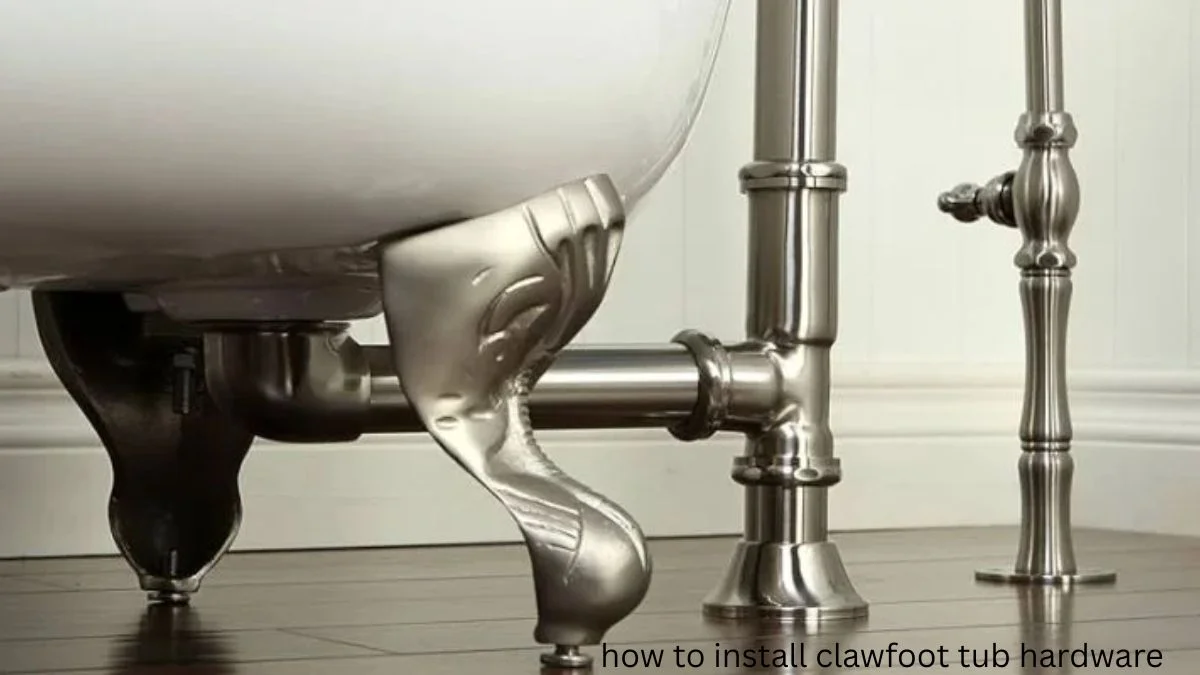
What Is Clawfoot Tub Hardware?
Clawfoot tub hardware refers to all the plumbing and fixture components required to operate a freestanding clawfoot bathtub. These parts are not hidden behind walls, making them both functional and decorative.
Common clawfoot tub hardware includes:
- Freestanding tub faucets
- Supply lines (floor-mounted or wall-mounted)
- Drain assembly and overflow kit
- Shut-off valves
- Rigid or flexible plumbing pipes
Choosing quality materials is essential when learning how to install clawfoot tub hardware, as visible components contribute directly to your bathroom’s overall style.
Preparation Tips Before Installing Clawfoot Tub Hardware
Before starting how to install clawfoot tub hardware, proper preparation can make the entire process faster and more accurate. Dry-fitting all components allows you to confirm measurements, faucet height, and pipe alignment before final tightening. This step helps prevent common installation issues such as uneven spacing or misaligned supply lines. Preparing your workspace and organizing tools in advance also reduces installation errors and ensures a cleaner, more professional finish.
Tools and Materials You’ll Need
Before starting, gather all tools and supplies to avoid interruptions.
Essential tools:
- Adjustable wrench
- Pipe wrench
- Plumber’s tape (Teflon tape)
- Screwdriver set
- Measuring tape
- Level
- Silicone sealant
Materials:
- Clawfoot tub faucet kit
- Drain and overflow assembly
- Water supply lines
- Shut-off valves
Step-by-Step Guide: How to Install Clawfoot Tub Hardware
Step 1: Position the Clawfoot Tub Correctly
Place the tub in its final position before attaching any hardware. Ensure it’s level and aligned with existing plumbing connections.
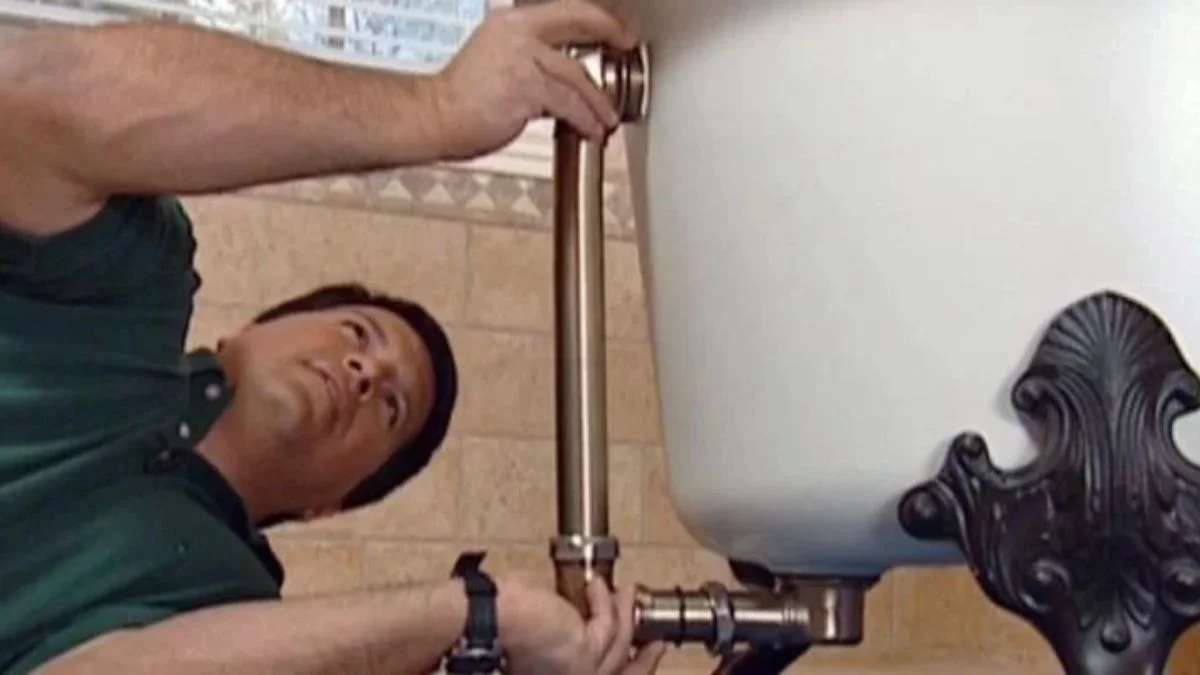
Step 2: Install the Drain and Overflow Assembly
Attach the drain and overflow according to manufacturer instructions. Put on plumber tape to avoid leak at the threads of the joint.
Step 3: Connect the Drain Pipe
Secure the drain pipe to your bathroom’s waste line. This step is critical when mastering how to install clawfoot tub hardware, as improper drainage can cause water backup.
Step 4: Install Shut-Off Valves
Attach shut-off valves to the hot and cold water lines. These allow easy maintenance and future repairs.
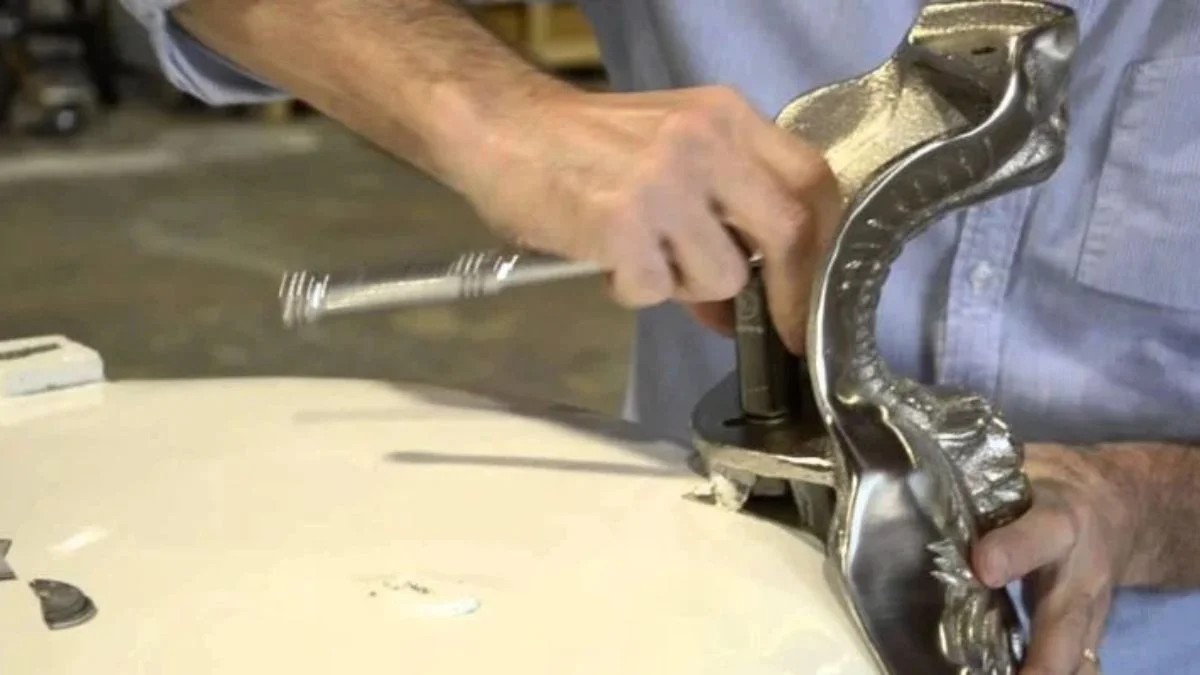
Step 5: Assemble the Faucet
Put together the faucet components, including handles and spout. Tighten connections carefully to avoid damaging the finish.
Step 6: Mount the Faucet
Depending on your design, mount the faucet to the tub rim, floor, or wall. Proper alignment ensures smooth water flow.
Step 7: Connect Water Supply Lines
Attach hot and cold supply lines securely using plumber’s tape. This is a key step in how to install clawfoot tub hardware without leaks.
Step 8: Test for Leaks
Turn on the water slowly and inspect every connection. Tighten fittings if needed.
Step 9: Seal Exposed Joints
Apply silicone sealant around floor penetrations to protect against moisture damage.
Step 10: Final Inspection
Check water pressure, drainage, and stability. Your clawfoot tub should now be fully operational.
Importance of Balanced Water Pressure
A key detail often missed when learning how to install clawfoot tub hardware is maintaining balanced water pressure. Uneven pressure between hot and cold water lines can cause inconsistent flow and reduce overall comfort. Ensuring that both supply lines are securely connected, free from kinks, and properly sealed allows for smooth operation. Balanced water pressure also minimizes wear on internal faucet components, helping your hardware last longer.
Common Mistakes to Avoid
- Skipping shut-off valves
- Overtightening fittings
- Incorrect faucet height placement
- Ignoring leveling adjustments
Avoiding these mistakes ensures success when learning how to install clawfoot tub hardware.
Protecting Your Bathroom Floor During Installation
Understanding how to install clawfoot tub hardware also involves protecting the flooring beneath your tub. Because clawfoot tubs use exposed plumbing, even a small leak can cause water to seep into the subfloor. Applying waterproof silicone around floor penetrations and pipe openings helps prevent moisture damage. Regular inspection of these sealed areas ensures long-term protection against mold, rot, and structural issues.
Maintenance Tips for Long-Lasting Performance
- Clean exposed pipes regularly
- Check fittings for leaks every few months
- Avoid harsh chemical cleaners
- Tighten loose hardware promptly
Proper care extends the life of your clawfoot tub hardware.
Benefits of Proper Clawfoot Tub Hardware Installation
- Enhanced bathroom aesthetics
- Improved water efficiency
- Reduced risk of leaks
- Increased home value
- Long-term durability
Understanding how to install clawfoot tub hardware correctly adds both beauty and function to your space.
Conclusion
Mastering how to install clawfoot tub hardware is a valuable skill that combines practical plumbing knowledge with classic bathroom design sensibility. When installed correctly, clawfoot tub hardware not only enhances the visual appeal of your bathroom but also ensures smooth water flow, proper drainage, and long-term reliability. From positioning the tub and assembling the drain to connecting supply lines and testing for leaks, each step plays a critical role in achieving a flawless installation.
Whether you’re a DIY enthusiast or a homeowner tackling a bathroom renovation for the first time, understanding how to install clawfoot tub hardware helps you avoid costly mistakes and unnecessary repairs. Taking the time to use quality materials, follow proper techniques, and perform regular maintenance will keep your clawfoot tub functioning beautifully for years to come. With patience and attention to detail, your clawfoot tub can become a stunning, functional centerpiece that adds comfort, elegance, and value to your home.
FAQs
1. Can I install clawfoot tub hardware myself?
Yes, with basic plumbing knowledge and proper tools, DIY installation is possible.
2. How long does installation take?
Typically 4-6 hours, depending on experience.
3. Do I need special plumbing for clawfoot tubs?
Yes, freestanding tubs require exposed plumbing connections.
4. What material is best for clawfoot tub hardware?
Brass and stainless steel are durable and corrosion-resistant.
5. Why is my clawfoot tub leaking after installation?
Leaks often result from loose fittings or missing plumber’s tape.